Tuesday 8 October 2013

How to wash and care for clip in human hair extensions.

How you care for your hair extensions will determine how long they last for. The human hair extensions can be affected by heat styling, colouring, incorrect shampoos and styling products just like your natural hair. So it is just as important to care for your extensions to keep them in good condition.

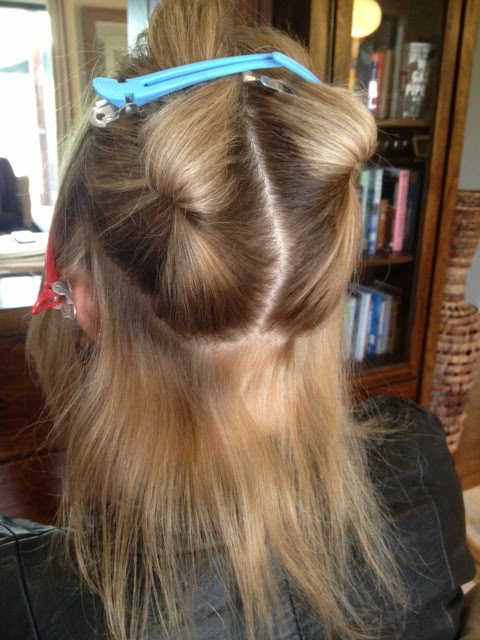
Wavy clip in human hair extensions

Washing clip in human hair extensions.


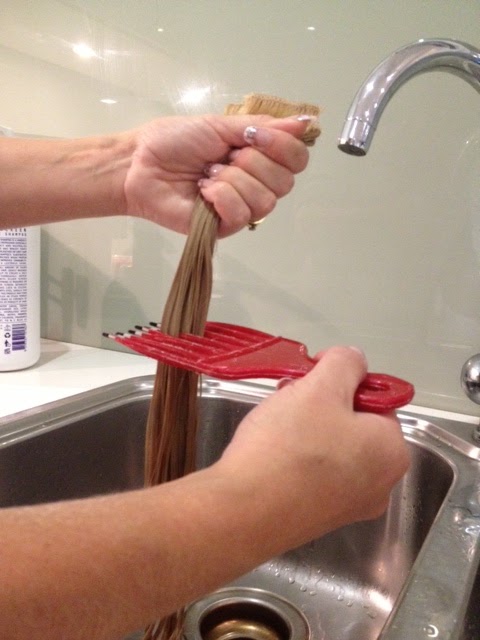
   1. Start by rinsing the hair with warm water, not hot. Simply let the water run through until all the hair is wet. Always hold the hair just under the clips to keep it secure.

  
   2. Gently run the shampoo through the hair from top to bottom. Do not rub the hair. Then rinse 
thoroughly.


   3. Next gently run through the conditioner, again not rubbing the hair. With the conditioner still in use a wide tooth plastic comb to detangle the hair. Rinse the conditioner thoroughly. Doing a final rinse in cold water helps to close the hairs cuticle. It is important to use good quality moisturising shampoo and conditioner to keep the soft and healthy. A moisturising treatment can also be applied. 


4. For wavy clip in extensions lie the hair in it's original wave until completely dry. This will set them in a nice soft bouncy wave again. For
straight hair you can blow dry, but if you have time let them dry naturally. Remember too much heat styling is not good for any hair. When the straight extensions are dry smooth them over with a straightener set at cool-medium, 170/180ºC. When brushing hair extensions always use a loop hair extensions brush. They cause less snagging and breakage and no static. Store bag in their bag.


Now your hair extensions will be ready for your next night out!


Thursday 15 August 2013

How to apply micro hair extensions?

Get longer, thicker hair with micro hair extensions!


Micro loop hair extensions are fast becoming the most popular hair extensions on the market. They are easy to apply with the micro bead and loop already attached, anyone can do it. You might need a friend to help around the back but you'll save $100's doing it at home. Micro hair extensions look natural as they come in individual strands in a variety of colours so you can match up to your own hair by using 1 or more colour. Most hair extensions these days are made from human hair, but it is important it is remy hair. Remy hair looks healthier, lasts longer and can be blow-dried, straightened, curled and coloured. For more info on remy hair check out What are remy hair extensions?

How to apply micro hair extensions

What you need:
- 100-150 micro hair extension pieces for fine to normal hair, 150-200 for thick hair
- hair extension pliers
- sectioning clips and tail comb
- hair extension loop brush 


         1.        First section the hair leaving an inch out around the
                    hairline. This hair will help hide the hair extension
                    beads when wearing your hair up. Clip the rest of the
                    hair up out of the way. It is important your section is
                    neat so no stray pieces of hair get caught in the beads.
                    This is where you will start applying your first row of
                    hair extensions.


 2.    Take a small piece of hair around the same
        thickness as the hair extensions. Make a
        slight twist in your strand of hair to make it
        neater and easier to handle. Then place your
        piece of hair through the plastic loop.


 3.    Working close to the scalp pull on the plastic
        loop to feed your hair through the hair
        extension bead. Now slide the bead up to
        your roots, but not all the way. Leave about
        5mm from your scalp so there is not too
        much tension on your hair.


         4.       Now using your pliers squeeze the bead firmly so
                   that the extension feels secure when you pull on it.         
                   Make sure you clamp down in the middle of the
                   bead and on the edges. As the hair settles in if any
                   of the beads are not tight enough they can slip,
                   you can easily give them another squeeze with your
                   pliers to tighten them again.


                  5.       Work your way up in rows leaving the inch out
                            around the hairline. When you get to the sides
                            leave out 1.5-2 inches around your face and ears,
                            the hair can be finer here and the beads easier to
                            see. Place the extensions about 1.5 inches lower
                            than your crown so there is plenty of hair to fall
                            over top of all the beads. The top row of extensions
                            can be spaced out more so they blend more with
                            your own hair.


Tips:
Now you can straighten, curl and
blow dry your hair! Always use a
hair extensions loop brush when
brushing knots out. Hold the hair at
the top, below the beads when brushing. Never brush wet hair, use
a wide tooth plastic comb or
de tangle with fingers. Use a quality moisturising shampoo & conditioner, but don't condition the roots near beads. Always wash in cool water. Use moisturisers and Moroccan oils in ends only. If you need to balance the colour, gentle colours like toners & semis can be used. Always use a low          temperature setting when styling.

Shop for micro loop human hair extensions.

Tuesday 7 May 2013

How to apply artificial nails.

An easy to follow guide to apply artificial nails!

Wish you had yourself some of those new funky designed nails? Well now you can, and it doesn't have to cost you a fortune. It's easy! Follow my step by step guide to amazing looking nails.


Apply artificial nails


  • Start by preparing your own nails. File your nails down so they're not too long and smooth off any chips or edges. Tidy up your cuticles. Buff the surface of your nails. Clean your nails with an acetone free polish remover. TIP: The fake nails stick better if your nails are not long.

  • Now select the fake fingernails. Make sure they fit perfectly. You don't want any air pockets.


  •  Apply the glue straight onto your fingernail. Cover your whole nail with glue. Your better to wipe off a bit of excess glue than not have enough. Just be sure to wipe it away immediately.


  • Apply the artificial nail at the cuticle first and lower the rest of the nail down. This will ensure the false nail sits snuggly against your cuticle. Hold the nail in place for 10-15 seconds. Repeat on all your nails. TIP: Start at your pinky and alternate hands working up to your thumbs. 


  • Once all the fake nails are firmly stuck you can file them to the shape and length you like.

How long do artificial nails last?

These type of fake nails last around 7-10 days. It is recommended you wait a day or 2 before applying a new set of nails.


How to remove artificial nails?

   To remove the fake fingernails cut them down shorter and file the surface to remove some of the hard protective layer. Now soak in an acetone based nail polish remover. This can take around 10 minutes. You will feel when the acrylic becomes soft. Moisturise your hands after as the acetone is quite drying.


Go to Glamshop for a beautiful selection of artificial nails at great prices.
                                        www.glamshop.com.au


Wednesday 1 May 2013

How to apply eyelash extensions?

Do it yourself eyelash extensions.

 Do it yourself eyelash extensions are the new cheaper alternative to getting those long lustful lashes. Lashes are the in thing right now and this DIY technique is so quick and easy to do. You'll save a fortune on trips to the salon.


Applying your own eyelash extensions


What do I need?
  • lash extensions
  • eyelash extensions glue
  • small square of foil
  • eyelash tweezers- fine curved tip for picking up lashes and non   static so the lashes don't stick 
  • eyelash extensions glue remover
First squeeze a small amount of glue onto the foil. Next with your tweezers carefully pick up a lash flare and dip the end into the glue.
With your eyes slightly open, position the lash flare at the base of your own eyelashes and hold in place for a few seconds. 
TIP: Do not apply with your eyes closed or the glue will stick to 
your bottom lashes also.
Now you can go on to apply as many as you like. If you are just wanting to thicken up your lashes with out any extra length then you can space them out a little and use 4 or 5 flares on each eye.
If you are adding length place them close together, you should use about 8 to 10 flares.
TIP: To give your eye beautiful shape use 2 or 3 longer lash flares on the outer corner of your eyes.

How long will they last?

Flare eyelash extensions last around 2 weeks. You can maintain them by simply reapplying a new lash as one falls out. However long term use is not recommended and you should give your eyelashes a few days break every few weeks in between sets. Never pull on the flares to remove them. You should always use a eyelash glue remover or wait for them to fall out naturally.


Tuesday 30 April 2013

What are Remy hair extensions?


Remy Hair (also spelt remi) is real human hair and the cuticle layer (outer layer) of the hair is still in tact. The hair has been processed into extensions with all the cuticles facing in the same direction. Which means the hair strands have been organised with all the roots at the top end and tips at the other. This results in a smoother, softer, shinier finish. Remy hair extensions are premium quality, they look and feel healthier than non-remy and will last longer.

The difference

Non-remy hair has been through a chemical process called an acid bath which strips the cuticle. Then a silicone is placed over the hair to give a smooth shiny look. The silicone layer wears away as the extensions are washed and the hair then returns to a raw, rough state that will tangle and matt easily. Therefore non-remy hair will not last as long.

The benefits

The benefits of using remy hair extensions are the simple fact that the hair is natural and you can treat it like your own. You can curl or straighten it, use styling products and wash the hair over and over. You can also colour the hair, but remember colouring is damaging even to your own hair so you should try and pick hair extensions that are as close as possible to your own hair colour. And look after the hair, for example blonde hair is generally dryer so use treatments. And always use good quality shampoo and conditioners to help your extensions last as long as possible.

How long do remy hair extensions last?

As remy hair is real human hair and of premium quality it will last a long time and the better you take care of them the longer they will last you.
Clip in remy hair extensions should last as long as around 1 to 2 years with proper care, depending on how often they are used and washed.
Permanent remy hair extensions like micro rings will last around 6 months. There are a few determining factors to consider. The type of styling that is used on the hair, like straightening, and how often it is done. Also the types of products used, are they good quality, and are they for hair extensions? Also permanent hair extensions need to be adjusted as they grow away from the scalp and through this process sometimes the micro rings become damaged and are not reusable. This only happens to a few and so they get replaced easily by new extensions. So the general rule for the overall set is around 6 months.


www.glamshop.com.au

Wednesday 24 April 2013

What is an ionic hair straightener?


    One of the most popular hair tools right now is the ionic hair straightener. They create straighter smoother healthier looking hair by emitting negative ions. 
    So what are ions? An ion is a molecule that has been charged. There are positive ions which are considered unhealthy, and negative ions, that have better energy and overall health. So an ionic hair straightener creates negative ions to neutralise the positive ions on the hair. The negative ions are produced by way of water molecules. These water molecules are emitted from the straightener and absorbed by your hair to rehydrate and restore moisture balance. Hair that has better retained moisture has less frizz and dryness leaving the hair smoother and shinier and therefore much healthier looking. Negative ions can also remove dirt, bacteria and odours from the hair.


Monday 22 April 2013

What temperature should my hair straightener be set at?


What temperature should my hair straightener be set at?

Even though many hair straighteners can be set as high as 230ºC not many of us should actually be using it that high. Here is a simple guide so that you can select the right temperature setting for your hair.

  • Is your hair fine? Do you bleach, lighten or colour your hair regularly with permanent colours? Has your hair been damaged by perming or chemical straightening treatments? Then your straightener should be set at around 160ºC. You do not want to risk damaging your hair any further by overheating. You will also find by using a lower heat on your hair straightener you will get a smoother result with less frizzy ends.
  • If you have healthy hair, meaning you use good quality shampoo and conditioners appropriate for your hair type, use treatments when necessary, do not over colour your hair and it is a medium texture then you can use your hair straightener at around 190ºC. You are better to use a moderate temperature, take your time when straightening and go over a section when needed then to rush it and damage your hair with too much heat.
  • For those with thick, coarse hair, tight curls and has not been previously damaged by colouring or other chemical treatments then set your hair straightener to 210º-230ºC. If you straighten regulary then don't go as high as 230º.

The best hair straighteners have a temperature control, if your doesn't then you are more than likely straightening your hair too hot. Many of the more expensive straighteners still do not have this feature.
You should use a heat protective product before you straighten your hair unless you have a straightener that has a negative ionizer. The negative ions help to close the hair cuticle which will make your hair look silky, shiny and healthy.

                                       Hair straightener and curler with adjustable temperature 140º-210ºC
                                                                 from www.glamshop.com.au
                                          
                                      www.glamshop.com.au/hair-straightener-curling-iron